Wow…my site’s still alive!

Ha, holy cow, it’s been 3 1/2 yrs since I posted last and this beast is still up and running! Honestly, I’m going to try and post at least twice a year – snort!

But if you’re still out there folks, here’s one of those freebies that  I used to post more frequently back in the old days. Links are valid until January 7th.


Inks & Thinks isn’t the only thing I’ve been neglecting to update. My Goodreads feed shows a book I finished back in Sept and I’ve read tonnes since then…but, you guessed it, haven’t updated that either! And although things have changed since my last, long ago post, I still love quotes, so here goes.

“For a really long time, I thought being different was a negative thing. But as I grew older, I started to realize we were all born to stand out; nobody is born to blend in.”
Halima Aden

Yikes!

Just realized that I haven’t posted in almost a year! Clearly my time is going by very quickly. Can’t say that I’ve accomplished anything major in the past year or even created any cards/scrap pages worth posting. Guess I should clean my craft area and get back to it.

In the meantime, here are 3 freebies for you.

KS_SplashNSpring_QP1_PV1

PaintedWaterfalls

Preview

I hope you can make good use of them!

It takes a long time to bring the past up to the present.
FDR

Mmm…pie!

Hey, here’s another freebie for paper crafting thanks to mymemories.com  but only until Jan 14th!  Although these say they are for pie, seriously, do you have anyone you love so little that you’d just give them one slice?  Once filled with cool things, they’d be great as a goodie bag for a girls’ party or a teacher gift.
Pie Box Tutorial
1. Print your file on cardstock. To create a pie box, you will need one base and one top. Gather necessary supplies. (Recommended supplies: ruler, scissors, glue, bone folder with pointed tip) Be sure to set your margins as close to zero as possible when printing.
pies printed
2. Using the bone folder score from the top tip down to each of the corners.  There should be 3 fold lines forming a triangle on each piece. Also,
score the small tabs on the box sides.
pies scored 2 pies scored
3. Cut out all of your box pieces.
pies scored

4. Fold on the fold lines. Folds should all be folded in towards the white side of the paper.

pie folded

pie cut

5. Place glue on all the small flaps.

pie edges

6. Bring base and flap up and glue in place. Repeat all sides.  Repeat Steps 5 and 6 for lid.

pie base

7. Enjoy your pie box.

pie finished

8. Multiple boxes can be made to look like a pie by placing the centers together.

pies together

Detailed instructions are thanks to mymemories.com

“Good apple pies are a considerable part of our domestic happiness.” Jane Austen

Get a tree yet?

Do you kill your own tree for Christmas or buy it at the hardware store? Put up a plastic one complete with frosting and pine scent? Or simply use the biggest branch the last windstorm dropped in your backyard?

Pretty in pink?

Pretty in pink?

tree kill

You know you want to!

Whose house? I know!

Whose house? I know!

But hey, no matter how you celebrate, everyone loves a freebie!  So here’s another time limited seasonal decor item thanks to mymemories.com.  Get it before Christmas Eve.

 http://www.mymemories.com/store/share_the_memories_kit_1

Tree 1

http://www.mymemories.com/store/share_the_memories_kit_2

Tree 2

http://www.mymemories.com/store/share_the_memories_kit_3

Tree 3

And here’s what you do with them…

3D Tree Tutorial
1. Print your file on cardstock. To create a 3 layered tree, you will need one base, one middle piece, and one top. Gather necessary supplies. (Recommended supplies: ruler, scissors, glue, bone folder with pointed tip) Be sure to set your margins as close to 0 as possible.
2. Using the bone folder score from the top tip down to each of the 3 corners. There should be 3 fold lines from the tip on each piece. Also, score the bottom triangle of the base.
tree folds
3. Cut out all of your tree pieces.
tree bits
4. Fold on the fold lines. Folds should all be folded in towards the white side of the paper.
tree folded bits
5. For top and middle pieces, place glue on the flap and glue together to form a pyramid.
6. For the base piece, apply glue to both flaps.
7. Bring small triangle base up and glue in place.
tree pyramid
8. Attach the side tab to the inside flap to form a pyramid.
9. Stack tree pieces, as desired. These trees can be made using 1, 2, or 3 layers per tree.
I’d love to see what ones folks actually make as I personally don’t have the time this Christmas…maybe next year?
Gee, do they still make wooden Christmas trees?
-Linus

Cool cupcake wrappers

Here’s a great freebie for those of you who like to pretty up your summer treats.  If you have the right software, you can even make your own personal touches.  If you don’t have any software that will work for these, you can download them just as zip files.

If you are looking for a cheap ($39.97 US) but good scrapbooking, card-making software that you can use these with I can give you a code to get $1o off the software, My Memories.  If you use this code to purchase the software, you will also get a code worth $10 to spend at mymemories.com so you can get some cool digital downloads to work with. (You can find the code in the right hand column of my blog.)

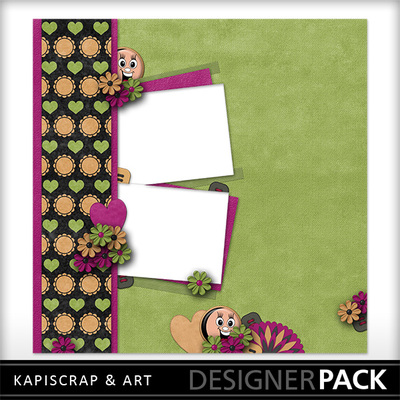
http://www.mymemories.com/store/share_the_memories_kit_1  Click here to get the July 4th topper.

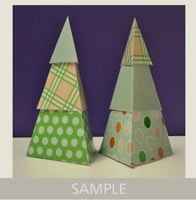
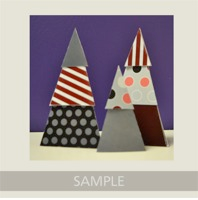
http://www.mymemories.com/store/share_the_memories_kit_2   look like these:

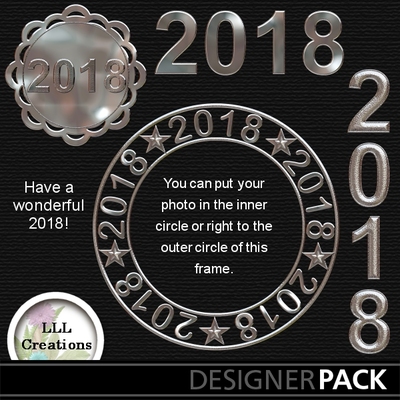
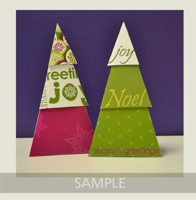
The last one is quite elegant.

This can be found at: http://www.mymemories.com/store/share_the_memories_kit_3

Using MyMemories Software to Customize your Cupcake Liners

  1. Download template file and install it into your software
  2. Using MyMemories Suite, choose Create Album From Designer Template and find your project
  3. Now you can print and enjoy the provided template, or customize it with your own papers and embellishments.

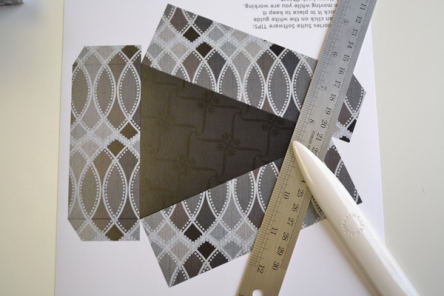
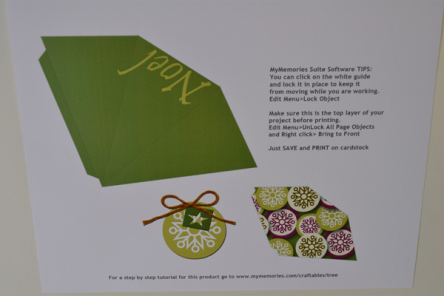
TIP: You can right-click on the white guide and lock it in place to keep it from moving while you are working. Make sure this is the top layer of your project before printing. Instead of adding the paper as a background paper, you can add it as an embellishment so that you can move the paper around.  This is especially useful when using papers with stripes or circles, so you can decide which part of the paper you want to use. Once it is added as an embellishment, you can now select the paper and move it into the position you want it.  Just SAVE and PRINT on cardstock!

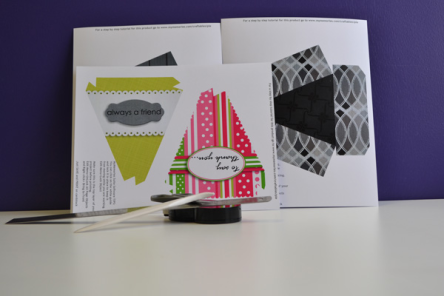
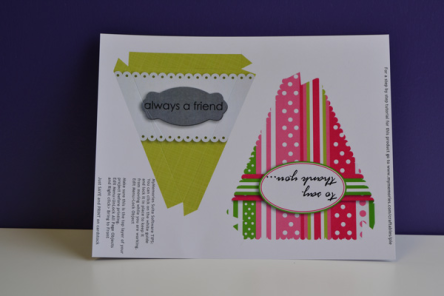
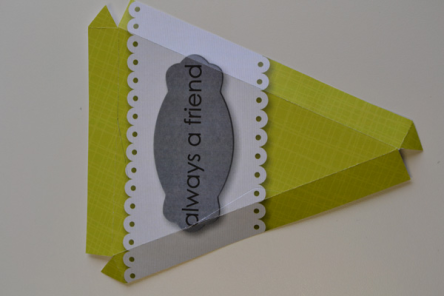
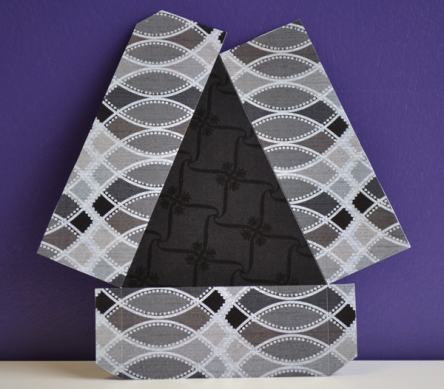
Cupcake Liner Tutorial

1.  Purchase or bake and cool cupcakes.  If cupcakes are frosted, place in refrigerator and chill cupcakes before putting liners on.  It is easier to put liners on if the frosting is cold. 2.  Print your cupcake liner templates on cardstock and gather supplies.  Each printed page will have enough supplies for 2 cupcakes. (Recommended supplies: small craft scissors, tape, foam squares, 1.25″ circle punch, toothpicks and ribbon)
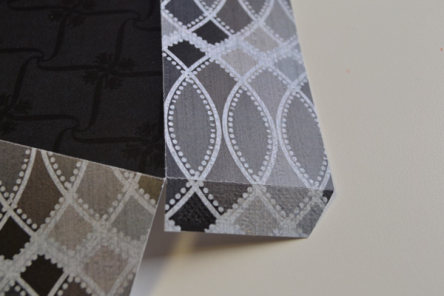
3.  Using the scissors cut along outside line. TIP: Use a 1.25″ circle punch to cut out the toppers.  If printed at full size, the circles should be exactly the same size.

Cut out Pieces

4.  Wrap liner around cupcake and tape at seam. TIP: If using a smaller cupcake, just wrap around at the desired height. You can place a smaller cupcake at the bottom of the liner or make it tighter and wrap it around at the top.

Wrap liner around cupcake
5.  Using foam squares or tape, attach the front and back circles together to form the topper. Insert toothpick between the circles.

Topper instructions

Cupcake topper
6. Add ribbon onto the toothpick or at the bottom of the front circle, if desired.

Add Ribbon

7.  Insert toothpick into cupcake.  Enjoy the finished cupcakes and share.  Don’t forget to use your imagination.

Finished cupcakes

If you do decide to purchase the software, the code to use is: STMMMS89083

“When you look at a cupcake, you’ve got to smile.”

~ Anne Byrn

Get some balls this Christmas!

Got your attention didn’t I?

Anywho, I’m posting after a huge break from writing to help promote something near and dear to my heart.  My eldest sister and her husband make gorgeous blown glass Christmas ornaments.  They sell for $20 each and ALL proceeds go to support The Ride to Conquer Cancer.


Like my mom, my sister is a cancer survivor and her husband did the ride in her honour for the past two years.  Even better, she rode it last year.  When she received the word that she was cancer free, she signed up.  The training was brutal for someone fresh out of chemo but she endured.  We are all so proud of her effort and thrilled that she made it across the finishing line under her own steam!  And speaking of steam, here’s a look at what her hot air (and a lot of other heat) can produce!


I’m posting this on my blog as it also links into Facebook.  For friends and co-workers, I have a supply of these at my desk that I can carefully wrap in tissue paper, put into a hand stamped (by my big sis) box and drop off or send out to you.  They are truly great gifts and each one is unique.


Here’s a look at the artists as they work.


Cancer is a word, not a sentence.

– John Diamond

Thank you gifts

The school year ended a couple of weeks ago and I did get my butt in gear and make cards and gifts for the classroom teachers and learning assistants who help my kids out.  Everyone got a variation of the teabag holder that I showed in an earlier post, Tea Time.   The cards were inspired by something I saw in the Sale-A-Bration brochure in the spring but I mucked about and made them all my own.

More another time – the kids need milk!  Like what you see?  Let me know!

The best teachers teach from the heart, not from the book.

~Author Unknown

C the card?

With three kids in school there at a lot of invites to birthday parties.  I love to send the girls to parties with a nice card to give the birthday person.  When I was little I loved  birthday parties and now I want to help make the big day a bit more special for the little monkeys.  Each card, if I have enough prep time, tends to have a personal touch to it.  Usually it is as simple as the addition of the kid’s initial but I have made ones before with the child’s picture.

This one is another variation of the card I saw in the Sale-A-Bration catalogue and CASEd in my last post.  But this time the birthday party was for a boy, so I changed it up a bit.

That’s it for now but I’ll soon get to a digital page!

A birthday is just the first day of another 365-day journey around the sun.
Enjoy the trip.

~Author Unknown

I’m so challenged

As a Stampin’ Up demonstrator, I have the pleasure of having the best upline in the whole world – not sucking up – it’s true.  Okay, you sideline girls rock too.  My direct upline is one of my best friends and her upline is a star in the stamping world.  One day, we all hope to be a quarter as good as Carrie is!  She inspires us to create and every once in a while challenges us with a new project.  It’s a love/hate thing when she does this though.

Last meeting, she gave all of us a lovely rectangular, clear topped tin and challenged us to make it into something other than just a tin.  That’s where the love/hate thing comes in.  I can get creative with paper and ink but throw in a tin and I’m hooped.

My inspiration came from another demo in Carrie’s downline and her awe inducing 3D scrapbook page that she housed in a shadow box picture frame – yes, Carol, you!  After some thought, I decided to create a tribute to my mom that I can keep on my desk at the library.  Mom is a breast cancer survivor and a hero to all in my family.  Especially appropriate is the stamp set that Stampin’ Up came out with recently for their Strength and Hope campaign where $2 from each set goes towards breast cancer research.

Want to help kick breast cancer to the curb?  Don’t forget to cope a feel and check for lumps, ladies!  Or click on the link to my Stampin’ Up site and buy this beautiful set.  Take a look at this great site, one of my hubby’s faves (he’s made some purchases on it, too): http://www.savethetatas.com/

Cancer is a word, not a sentence.

John Diamond

Teatime no. 2

I loved making the teabag holder that I posted about previously so I made another one – for me!  They look great but are relatively easy to make (otherwise, I’d have given up on the other one!).

It may be hard to see, but that’s a little teabag stamped on a mini tag. So cute, I love that set.

Those flecks you see are smooch spritz and a bit of metallic paint to dress it up.

That’s it for now but more to come soon!

Each cup of tea represents an imaginary voyage.

Catherine Douzel